How to Disassemble a Hub?
| Hub Removal |
Whenever the hub equipment on your axle must be removed for inspection or maintenance the following procedure should be
- Elevate and support the trailer unit per manufacturer’s
instructions ; - Remove the
wheel ; - Remove the grease cap by carefully prying progressively around the flange of the cap. If the hub is an oil lube type, then cap can be removed by unscrewing it counterclockwise while holding the hub
stationary ; - Remove the cotter pin from the spindle nut or, in the case of « E-Z Lube » versions, bend the locking tang to the free
position ; - Unscrew the spindle nut (counterclockwise) and remove the spindle
washer ; - Remove the hub from the spindle, being careful not to allow the outer bearing cone to fall out. The inner bearing cone will be retained by the
seal ; - On 7,2K and 8K, a hub puller should be used to assist drum removal.
| IMPORTANT |
| The cotter pin is for single use only. As soon as it’s removed, it must be replaced by a new cotter pin. |
| Seal Inspection and Replacement |
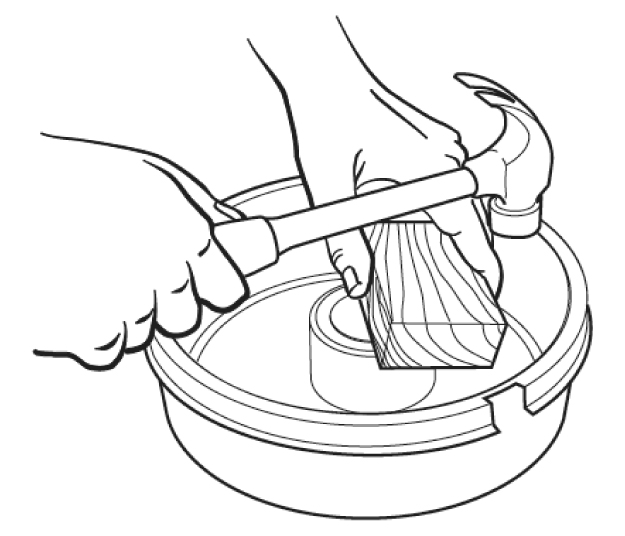
Whenever the hub is removed, inspect the seal to assure that it’s not nicked or torn and is still capable of properly sealing the bearing cavity. If there is any question of condition, replace the seal. Use only the seals specified in the bearing replacement chart below. To replace the
- Pry the seal out of the hub with a screwdriver. Never drive the seal out with the inner bearing as you may damage the
bearing ; - Apply green 6400 PERMATEX sealant to the outside of the new
seal ; - Tap the new seal at its place. Using a clean wood block.
| Bearing Inspection |
Wash all grease and oil from the bearing cone using a suitable solvent. Dry the bearing with a clean lint-free cloth and inspect each roller completely. If any pitting, spalling or corrosion is present, then the bearing must be replaced. The bearing cup inside the hub must be inspected.
| IMPORTANT |
| Bearings must always be replaced in sets of a cone and a cup. In case of doubt, Frameco strongly recommends that all maintenance and repair work be performed by qualified and competent professionals, such as your trailer manufacturer. |
When replacing the bearing cup proceed as
- Place the hub on a flat work surface with tue cup to be replaced on the bottom
side ; - Using a brass drift punch, carefully tap around the small diameter end of the cup to drive
out ; - After cleaning the hub bore area, replace the cup by tapping in with the brass drift punch. Be sure the cup is seated all the way up against the retaining shoulder in the hub.
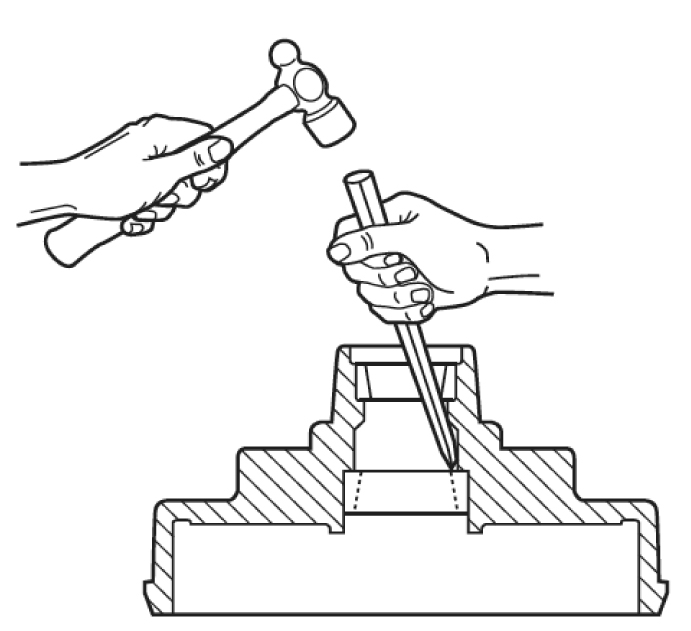
*Technic for removal of the bearing cup
Replace only with bearings as specified in the table below.
| Bearing Lubrication |
Along with bearing adjustment, proper lubrication is essential to the current function and reliability of your trailer axle. Bearings should be lubricated every
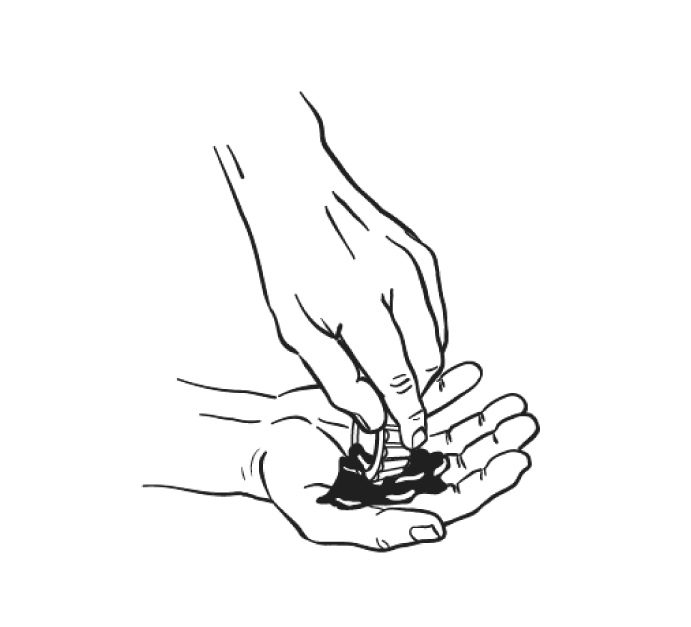
Method for bearings
- Place a quantity of grease into the palm of your
hand ; - Press a section of the widest end of the bearing into the outer edge of the grease pile closest to the thumb forcing grease into the interior of the
bearing ; - Repeat while rotating the bearing from roller to
roller ; - Continue this process until you have the entire bearing completely filled with
grease ; - Before reinstalling, apply a light coat of grease on the bearing cup.
| Bearing Replacement Chart |
| Brake | Hub | Bearings |
Seal | Dust cap |
| 7" | 5 studs | Inside: L44610/L44649 Outside: L44610/L44649 |
1789 (1") 2267E (11/16") |
1445 1446 (standard) |
| 10" | 5 studs | Inside: L44610/L44649 Outside: L44610/L44649 |
1789 (1") 2267E |
1445 1446 (standard) |
| 12" | 6 studs | Inside: 25520/25580 Outside: 15245/15123 |
0014E 0015E |
6045 6046 (standard) |
| 12" | 8 studs | Inside: 25520/25580 Outside: 14276/14125A |
0014E 0015E |
4045 4046 (standard) |
| 12 1/4" | 8 studs | Inside: 25520/25580 Outside: 02420/02475 |
1063 | 4045 4046 (standard grease) 2135 (standard oil) |
*If the dust cap is damaged or lost, it’s important to clean the bearing and completely change the grease.
| Bearing Adjustment and Hub Replacement |
If the hub has been removed or bearing adjustment is required, the following
adjustment procedure must be
- After placing the hub (1), bearings (2), washers (3) and spindle nut (4) back on the axle spindle in reverse order as detailed in the previous section on hub removal the hub assembly slowly while tightening the spindle nut to approximately
50 lbs/ft (12" wrench or pliers with full handforce) ; - Then loosen the spindle nut to remove the torque (do not rotate the
hub) ; - Back the spindle nut out slightly until the first castellation lines up with the cotter key hole and insert the cotter
pin ; - Bend over the cotter pin legs to secure the nut (or locking tang in the case of
« E-Z Lube ») ; - Nut should be free to move with only restraint being the cotter pin (or locking
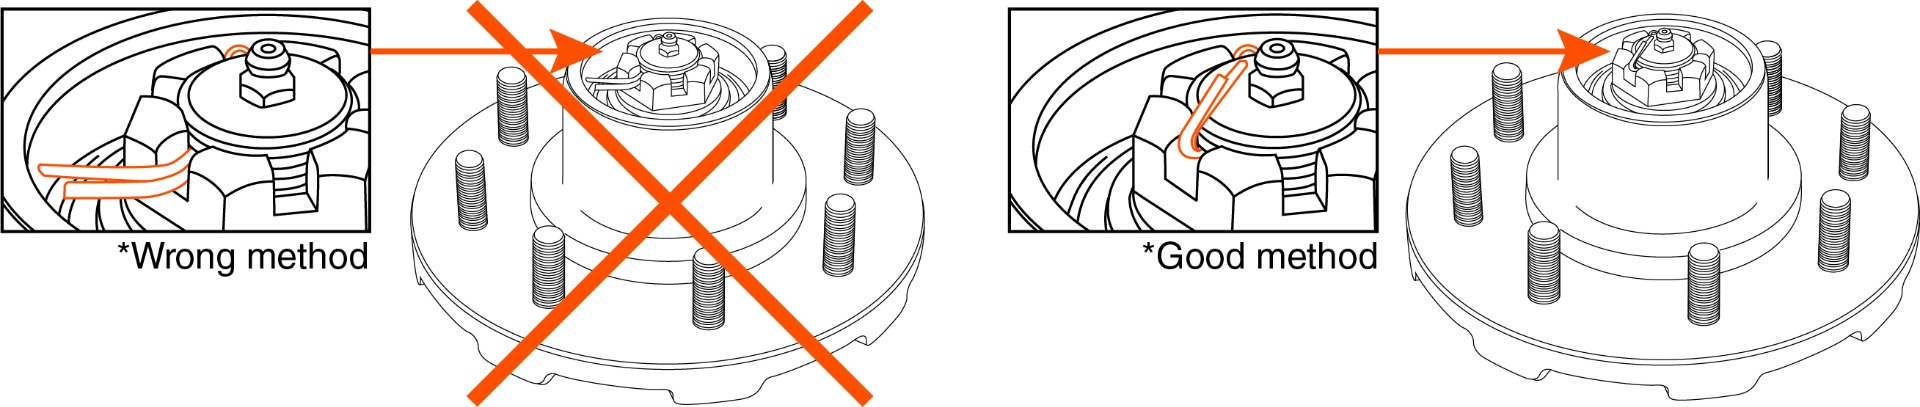
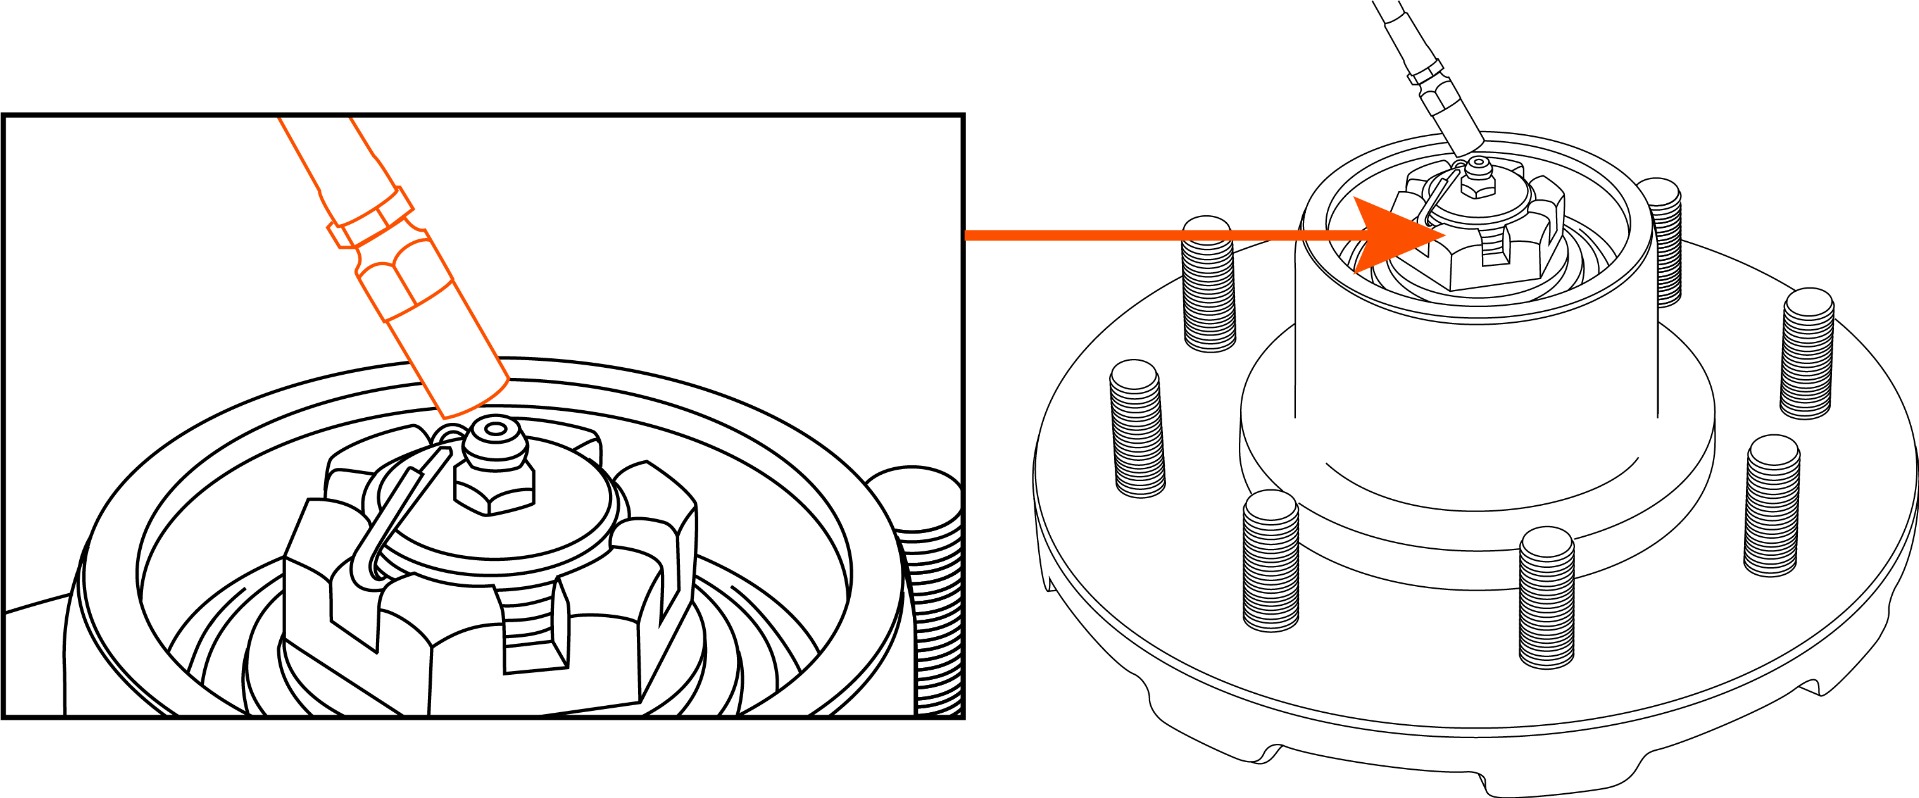
tang) ; - Lubricate the gauge with 100g (1/4 of tube) of lubricant (GADUS 220 (#XHP222) or equivalent), as presented in this
image ; - Install the dust cap.
| IMPORTANT |
| Note that you should never reuse the old cotter pin. |
* For the use of a boat trailer, it’s important to put grease until it passes through the bearing.